Qt5 and normal mapping - reloaded
(This is part II of the normal mapping journey, check the part I first for details.)
So you have all now played with Qt5 NMapper tool, right? Goody, that means we have gained experience of normal mapping and created some perfectly tuned normal mapped textures. Now it's time to use these in a separate application.
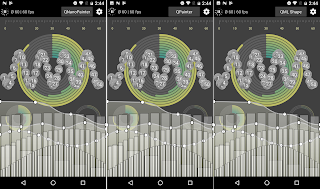
Let's assume that you are working on a 2D QML application, but would want 3D-looking effect into some part(s) of the UI. To visualize, here's an example NMapCarousel demo application:
(Qt5 NMap Carousel, running on PC and on Raspberry Pi)
Here normal mapping is used to make the carousel icons more dynamic by applying lighting. To increase the 3D impression, there are also extra shadows reflected behind the icons.
To implement something similar, here's how to proceed:
Source codes of this demo are available from here. I'm waiting to see cool normal mapping uses!
PS: To learn shaders from the master, check out Andrew's thndl.com!
So you have all now played with Qt5 NMapper tool, right? Goody, that means we have gained experience of normal mapping and created some perfectly tuned normal mapped textures. Now it's time to use these in a separate application.
Let's assume that you are working on a 2D QML application, but would want 3D-looking effect into some part(s) of the UI. To visualize, here's an example NMapCarousel demo application:
Here normal mapping is used to make the carousel icons more dynamic by applying lighting. To increase the 3D impression, there are also extra shadows reflected behind the icons.
To implement something similar, here's how to proceed:
- If not already, setup Qt5 to your PC/Mac/RPi or equivalent platform.
- Create normal maps of your graphic assets using Gimp, Blender, Photoshop etc. tool of your choice. Name the normal mapped image with extra "n" in the end, so images are something like "thing.png" and "thingn.png".
- Test your graphics with NMapper by copying these images into "images" folder and adding "thing" into imageFiles array property. Play with the light intensity, diffuse, switching x&y coordinates etc. If you are not happy with the results, jump back to step 2 to edit the images and iterate.
- Make your own application. Copy NMapEffect.qml and NMapLightSource.qml from NMapper, use your freshly made images, the lighting settings you tested earlier and implement rest of the UI.
- Profit! (Sorry that this took a bit more steps than normally... but on the positive side there is no unknown ???-step in the middle!)
Source codes of this demo are available from here. I'm waiting to see cool normal mapping uses!
PS: To learn shaders from the master, check out Andrew's thndl.com!

Comments