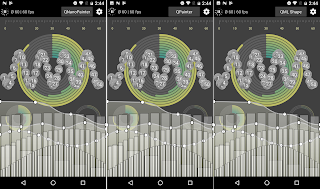
Qt5 and normal mapping
This one has been on my "blog at some point" back burner for some time now...
'Normal mapping' is a graphics rendering technique used for faking the lighting conditions. In 3D software it is often used for bringing small bumps and dents of textures visible to achieve more realistic graphical appearance without using huge amount of polygons. Normal mapping is kinda advanced version of preceding 'Bump mapping' technique. Where bump mapping uses just one channel for 'bumps', normal mapping uses 3-channel (RGB) bitmaps and can therefore contain more detailed normal vector information.
Normal mapping technique can also be used in 2D applications to get 3D'ish looking UI elements, which means it can be used also in normal non-Qt3D QML applications. Combining image textures with specifically made normal map textures using a suitable shader is all you need. And normal maps can be automatically created with Gimp, Blender, Photoshop etc. drawing tools, although for best results some tweaking may be required.
But enough about theoretical mumbling, here comes visuals:
(Qt5 NMapper tool, running on PC and on Raspberry Pi)
To experiment with normal mapping I implemented a simple Qt5 NMapper application. As seen from video, it can be used to play with different graphical assets, change lighting conditions, switch normal map x&y-coordinates etc. It also includes the essential 'cave mode' for wiggly fire light.. ;-)
Download NMapper application from here and try it on PC/Mac/RPi or equivalent platform with Qt5.
After this brief intro I'll make a follow-up post within few days about example usage. Have a hacking weekend everyone!
'Normal mapping' is a graphics rendering technique used for faking the lighting conditions. In 3D software it is often used for bringing small bumps and dents of textures visible to achieve more realistic graphical appearance without using huge amount of polygons. Normal mapping is kinda advanced version of preceding 'Bump mapping' technique. Where bump mapping uses just one channel for 'bumps', normal mapping uses 3-channel (RGB) bitmaps and can therefore contain more detailed normal vector information.
Normal mapping technique can also be used in 2D applications to get 3D'ish looking UI elements, which means it can be used also in normal non-Qt3D QML applications. Combining image textures with specifically made normal map textures using a suitable shader is all you need. And normal maps can be automatically created with Gimp, Blender, Photoshop etc. drawing tools, although for best results some tweaking may be required.
But enough about theoretical mumbling, here comes visuals:
To experiment with normal mapping I implemented a simple Qt5 NMapper application. As seen from video, it can be used to play with different graphical assets, change lighting conditions, switch normal map x&y-coordinates etc. It also includes the essential 'cave mode' for wiggly fire light.. ;-)
Download NMapper application from here and try it on PC/Mac/RPi or equivalent platform with Qt5.
After this brief intro I'll make a follow-up post within few days about example usage. Have a hacking weekend everyone!

Comments
Just curious, how did you make the normal map for it?
capisce: I'm a gimp guy so using this normal mapping plugin: http://code.google.com/p/gimp-normalmap/
Then some final touch with Gaussian blur, I like smoother Qt ;)
You rock, as always. This simply shows what QML is capable of.
Cheers.